Tag: authentication

  • Longwave vs. Shortwave UV: Which One Is Safe to Use on Autographs Over and Over

    Longwave vs. Shortwave UV: Which One Is Safe to Use on Autographs Over and Over

    As an Amazon Associate we earn from qualifying purchases. This post contains affiliate links, and we may earn a commission at no extra cost to you.

    You bought a 365nm UV flashlight to check cards before you buy them. Good move. But if you’re checking the same signed ball or the same box of cards every few weeks, a fair question comes up: is the light itself doing any damage?

    The answer depends entirely on which UV you’re using. Longwave and shortwave are not two flavors of the same thing. They’re different tools with a real gap in risk between them.

    Longwave and shortwave aren’t the same light

    UV covers a range, and where you sit in that range changes what the light does.

    Longwave UV (UVA) runs roughly 315 to 400nm. This is the “black light” range, the one your 365nm flashlight lives in. It’s low energy as UV goes. You’ve been exposed to it every time you’ve stood in the sun.

    Shortwave UV (UVC) runs roughly 100 to 280nm, with 254nm as the common output for shortwave lamps. It’s high energy, the kind used for sterilizing water and killing bacteria in hospital equipment. Your atmosphere blocks essentially all of it from reaching you outdoors, which tells you something about how your body and your collectibles are built to handle it. They aren’t.

    Some UV lamps sold to collectors are dual-wave, switchable between 365nm and 254nm for stamp collectors checking phosphor tagging. That’s a legitimate use case for stamps. It’s the wrong feature to go looking for if autographs and cards are what you’re checking.
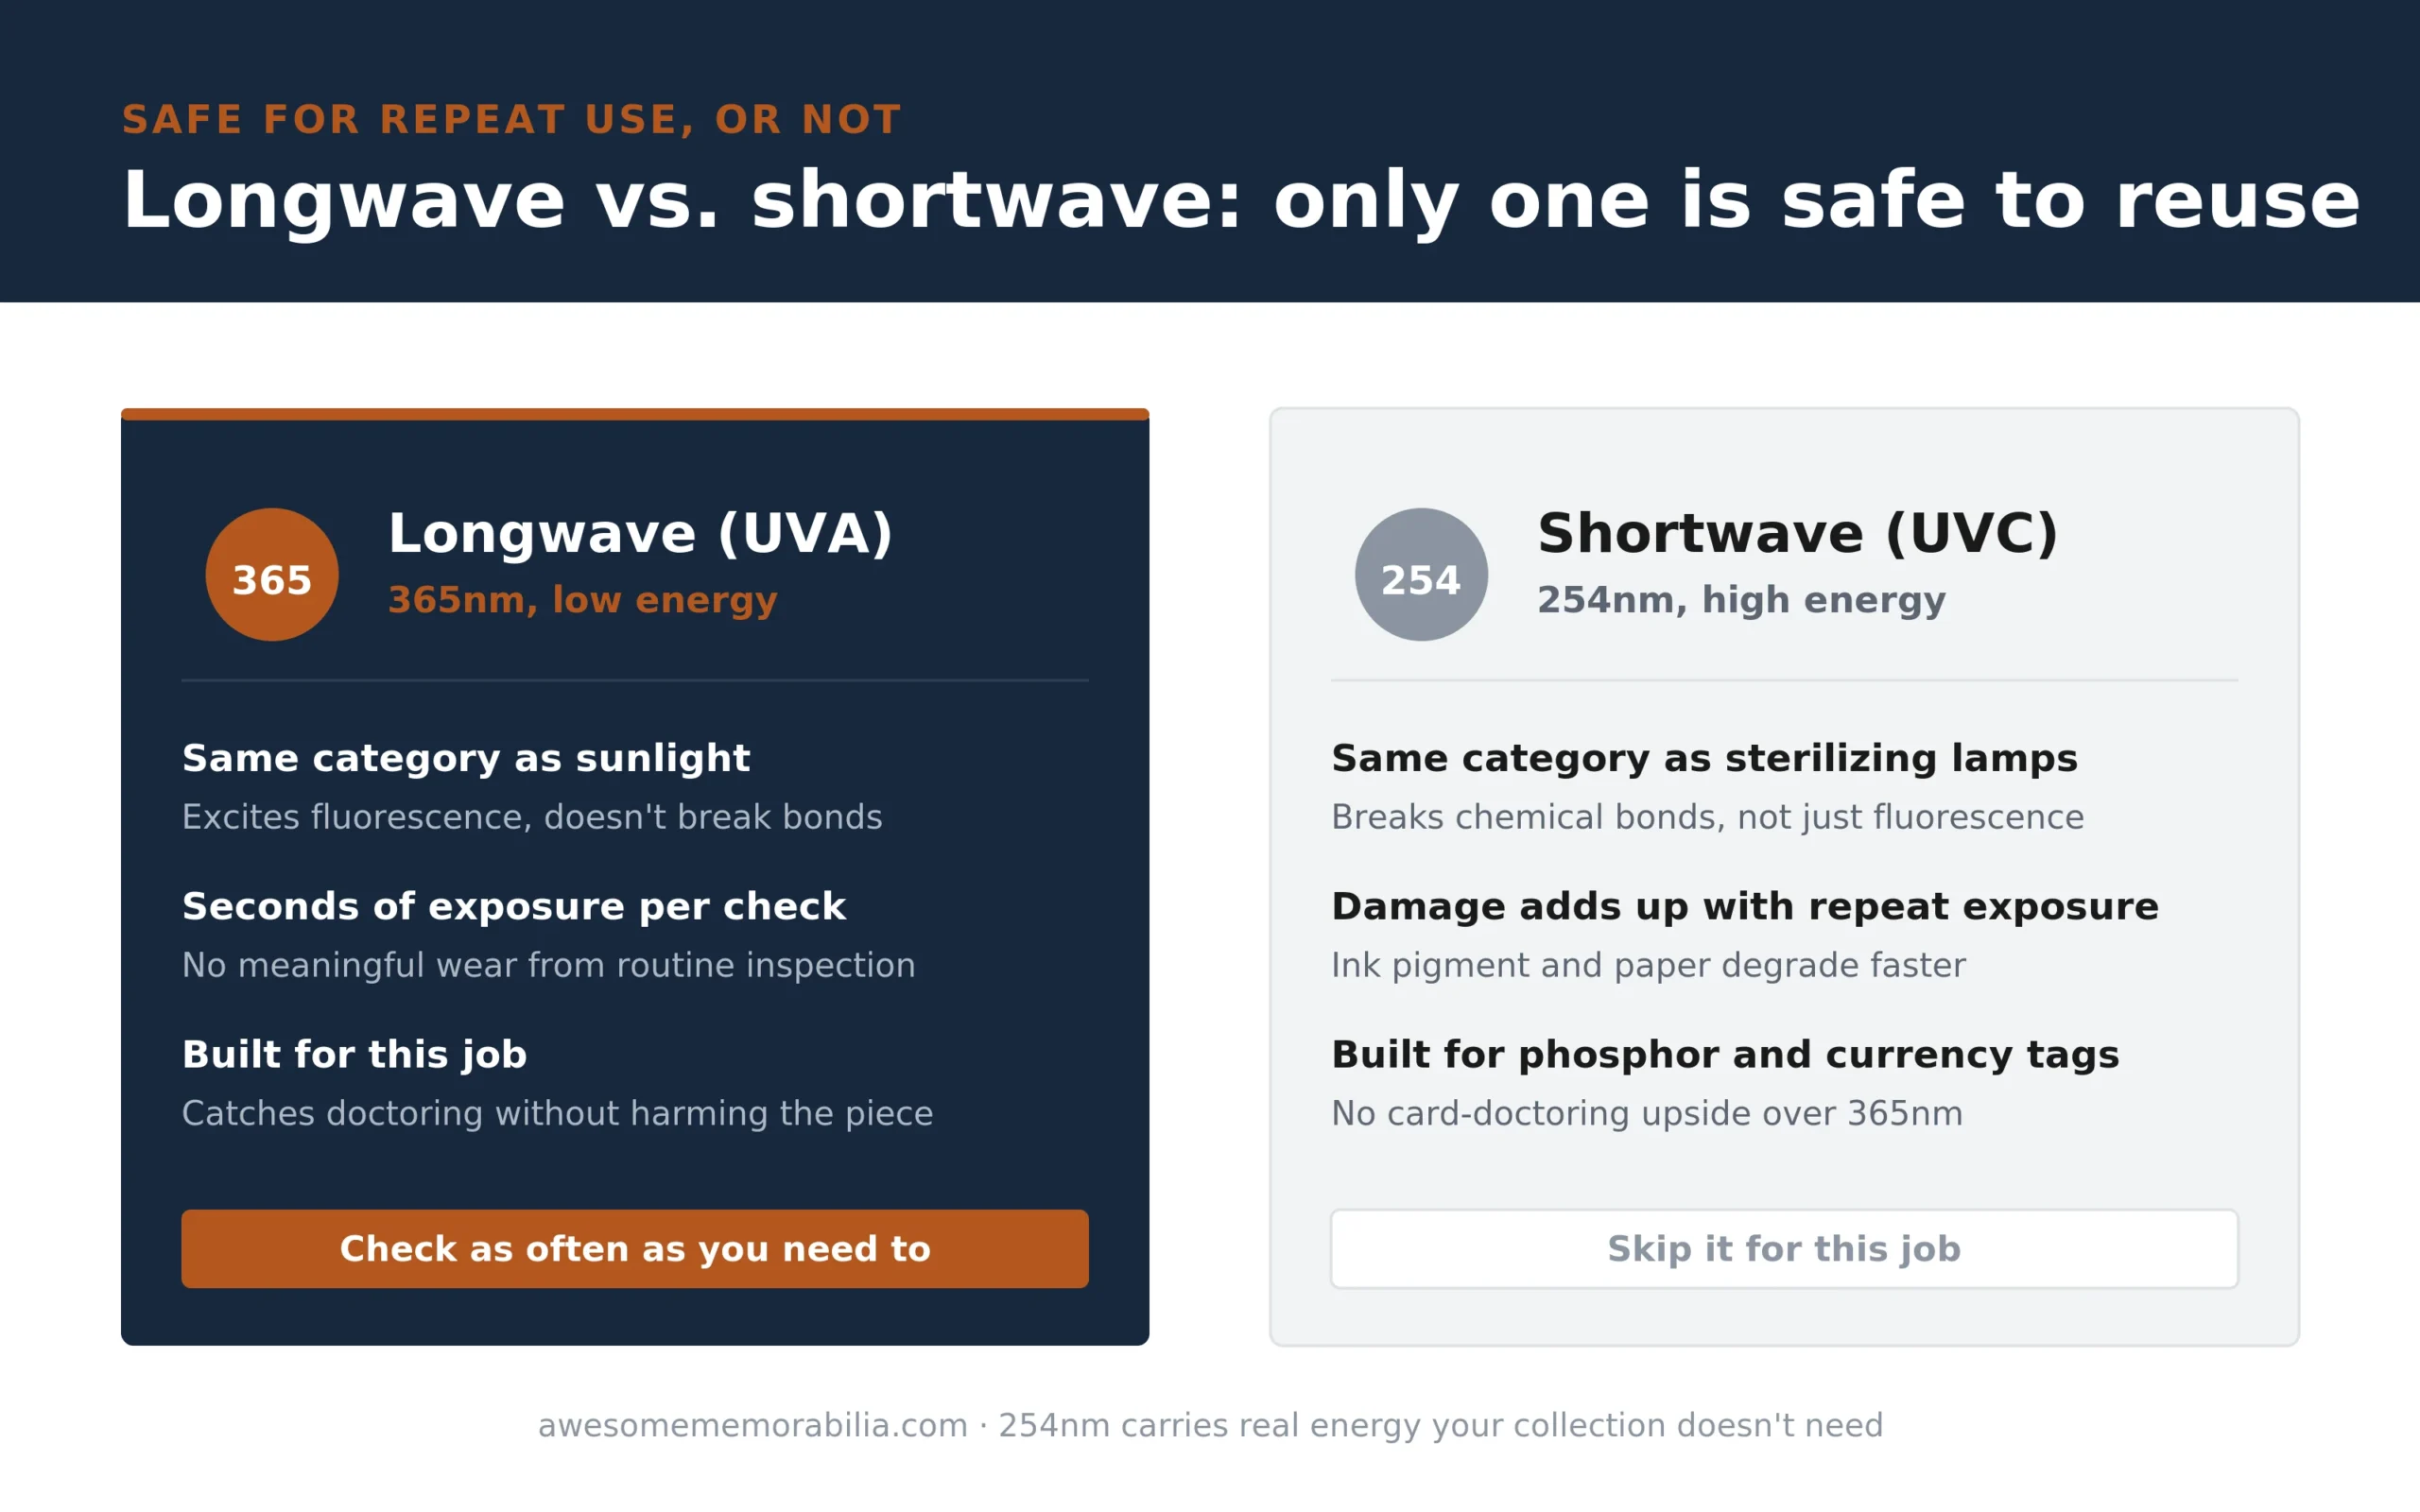
    Longwave 365nm is low energy and safe for repeated checks; shortwave 254nm is high energy, built for sterilizing and phosphor tagging, and adds up real damage to ink and paper with repeat use

    Why 254nm is the one to leave alone

    Shortwave UV carries enough energy to break chemical bonds, not just excite fluorescence. That’s exactly why it’s used to sterilize things: it damages organic material at the molecular level. Paper, ink binders, and card stock are organic material.

    A single accidental exposure isn’t going to ruin a card. But repeated, deliberate shortwave exposure adds up the same way sun exposure adds up on a couch left by a window. Ink pigments break down faster. Paper yellows and gets brittle sooner. You’d be authenticating the piece today while quietly aging it for tomorrow.

    There’s no upside that offsets this for autograph and card work. Shortwave’s real use is phosphor and security-tagging detection, a stamp-collecting and currency-authentication niche. It doesn’t show you doctoring, retracing, or trimming any better than longwave does. You’d be taking on real risk for zero extra information.

    Why 365nm doesn’t carry the same risk

    Longwave UV is the same general category of light you get walking outside on a cloudy day, just concentrated and without the visible light diluting it. It excites fluorescence without the bond-breaking energy shortwave carries.

    That doesn’t mean unlimited exposure is free. Any UV, including sunlight through a window, degrades ink and paper over years of constant exposure, which is the whole reason a UV-blocking display case matters for anything you keep on a wall. But a few seconds of 365nm during an inspection is a different order of magnitude from years of ambient light hitting a displayed piece. Checking a card under a 365nm light once before you buy it, and again if you ever want to re-verify it, isn’t going to measurably age it.

    So how often is too often

    For practical purposes, there isn’t a meaningful ceiling on 365nm inspection frequency for a collector. Dealers running boxes of cards under a light for hours a day, every day, for years are the edge case where cumulative exposure theoretically starts to matter, and even that risk is small compared to what shortwave does in seconds.

    What actually matters more than frequency:

    • Keep the exposure brief. Seconds per item, not minutes. You’re reading a reaction, not tanning the card.
    • Skip anything sold as a shortwave or dual-wave “UV lamp” for this job. If a listing mentions phosphor tagging or currency verification as the primary use case, it’s built for stamps and cash, not cards and autographs.
    • Don’t confuse UV output with brightness. A dim-looking 365nm beam can still be doing its job. You’re not supposed to see the UV itself, only what it makes glow.

    The real takeaway

    Buy 365nm. Skip anything shortwave. Check as often as you need to. The wavelength that catches doctoring and the wavelength that’s safe to use over and over turn out to be the same one, which makes this an easy call once you know the difference.
    Related guides

  • Best UV Flashlight for Spotting Fake Autographs and Card Restoration

    Best UV Flashlight for Spotting Fake Autographs and Card Restoration

    As an Amazon Associate we earn from qualifying purchases. This post contains affiliate links, and we may earn a commission at no extra cost to you.

    A doctored card looks perfect in daylight. That’s the whole point of doctoring. Recolored borders, a shaved edge, a signature touched up with fresh ink, all of it is meant to pass a quick glance under a desk lamp.

    Turn off the lights and hit it with the right ultraviolet light and the lie shows up. Added material fluoresces differently than the original. A recolored corner glows. A trimmed edge catches the beam wrong. Fresh ink over an old signature lights up like a road flare while the genuine autograph stays dull.

    The catch is that most “UV flashlights” sold as blacklights are the wrong tool, and they’ll give you a false sense of security. So let’s fix that first, then get to the three lights worth owning.

    The one spec that matters: 365nm, not 395nm

    Here’s the mistake that costs people money. They grab the cheapest blacklight on the shelf, wave it over a card, see nothing weird, and buy the card. The card was altered. Their light just couldn’t show it.

    Almost every bargain UV flashlight runs at 395nm. That wavelength throws a lot of visible purple light and not much useful UV. It’s fine for checking a hotel bedspread. It is not fine for catching a skilled card doctor.

    You want 365nm. It sits deeper in the UV band, excites fluorescence in restoration materials far better, and leaks much less visible light to wash out what you’re trying to see. Every serious authenticator, every pre-grader worth listening to, uses 365nm. Not 395nm. This is not a preference, it’s the difference between a tool that works and a toy that doesn’t.

    Second thing to look for: a filter lens. Even a good 365nm LED bleeds some visible light. A built-in filter (usually a dark glass called ZWB2 or a “Wood’s glass” lens) blocks that leak so the fluorescence pops against a clean dark background. Every light below has one.

    How to actually use it

    The light is half of it. Technique is the other half.

    Work in a dark room. Not dim, dark. The darker the room, the more obvious the difference between original and added material.

    Hold the card flat and move the beam across it at a low angle, then straight on. You’re watching for areas that glow a different color or brightness than their surroundings. Compare like to like, border to border, corner to corner.

    What you’re hunting for:

    • Recoloring. Someone dabbed color onto a worn border or corner. It fluoresces brighter or a different shade than the untouched border next to it.
    • Trimming. A cut edge often looks cleaner and reflects differently than a factory edge, which has a slight fuzz. Undersized cards paired with a suspiciously crisp edge are a red flag.
    • Added or restored ink on autographs. A retraced or “improved” signature glows against the older, duller original ink. A completely forged signature laid over a printed or blank area often fluoresces hot and even.
    • Adhesive and repairs. Glue, tape residue, and paper patches on cards, photos, or documents almost always light up.

    One honest limit, because it matters. UV does not authenticate a signature by itself. It flags added material, restoration, and doctoring. It does not tell you a genuine-looking signature was actually signed by the player. Pair what the light shows with provenance, a known exemplar, and when the money is real, a reputable third-party authenticator. The flashlight is your first filter, not your last word.

    The picks

    All three are 365nm with a filter lens. The difference is size, output, and how much you want to spend.

    Best overall value: ALONEFIRE SV003 10W 365nm

    If you buy one light, buy this one. It’s a genuine 365nm LED at 10W behind a hard black filter lens, in an aluminum body that actually sheds heat instead of cooking itself. It’s USB rechargeable and ships with the battery and charger, so there’s no scavenger hunt for cells. For checking cards on a desk, at a show, or before you click buy on an eBay listing, it does everything you need and nothing you don’t.

    Good: True filtered 365nm, strong output for the money, aluminum body, comes ready to use with battery and charger.

    Not great: It’s a mid-size barrel light, not pocket-friendly. The included charger is one more thing to keep track of. Battery life is fine, not remarkable.

    Best Overall Value

    ALONEFIRE SV003 10W 365nm UV flashlight

    ALONEFIRE SV003 10W 365nm

    • True filtered 365nm, the wavelength that actually catches doctoring
    • 10W output behind a hard black filter lens
    • Aluminum body, ships with battery and charger
    Check current price on Amazon

    Best pocketable: uvBeast V3 365nm MINI

    Same uvBeast 365nm quality in something that rides in a pocket. This is the one to carry to card shows and shops, where you’re checking a card in someone else’s booth and don’t want to haul a full-size barrel. Filtered 365nm, USB-C charging with no unscrewing or loose cells, and a double-click power switch so it doesn’t cook in your bag. The viewing quality is genuinely a step up from budget lights.

    Good: Truly portable, filtered 365nm, simple USB-C charging, clean UV with little visible leak.

    Not great: Smaller emitter means less raw output than the full-size uvBeast, so you’ll want a darker room to get the same read. The double-click-to-turn-on switch confuses people at first (it’s not broken, it’s on purpose). Costs more than the Alonefire for less power.

    Best Pocketable

    uvBeast V3 365nm MINI UV flashlight

    uvBeast V3 365nm MINI

    • Filtered 365nm in a body that rides in a pocket
    • Made for checking cards at shows and shops
    • USB-C charging, no loose cells to fumble
    Check current price on Amazon

    Best high output: uvBeast V3 365nm (full size)

    Overkill for one card at a time, ideal if you’re checking volume. Triple 365nm LEDs behind a proper filter, high flux density, and a beam that actually reaches across a table. If you’re a dealer, a serious pre-grader, or you’re going through boxes of raw cards and want the fastest, most obvious read, this is the strongest of the three. It also handles documents, photos, and larger memorabilia without making you lean in.

    Good: Highest UV output here, filtered 365nm, long range, best for working through a lot of material fast.

    Not great: Biggest and priciest of the three. More light than most collectors checking the occasional card will ever use. The output is strong enough that eye protection is a real idea, not an afterthought, so wear UV glasses.

    Best High Output

    uvBeast V3 365nm full size UV flashlight

    uvBeast V3 365nm (full size)

    • Triple 365nm LEDs, highest output of the three
    • Long range beam for working through volume fast
    • Filtered UV, ideal for dealers and pre-graders
    Check current price on Amazon

    Which one should you get

    Most collectors should buy the Alonefire SV003. It’s the right wavelength, it’s filtered, it’s cheap enough that there’s no reason to gamble on a 395nm light, and it’ll catch the doctoring that matters.

    Buy the uvBeast MINI if you’re mostly checking cards away from home and want something in your pocket at the show. Buy the full-size uvBeast if you move real volume and want the strongest, fastest read on the table.

    Whatever you pick, get 365nm and get a filter. A 395nm light that shows you nothing is worse than no light at all, because it makes you feel safe while you buy the altered card.

    A quick word on your eyes

    365nm UV is invisible and it does not feel bright, which is exactly why people stare into it. Don’t. Don’t shine it in anyone’s eyes, and with the high-output light, wear UV-blocking glasses. The good lights here either include them or make it easy to add a pair. Cheap habit, real payoff.

    Related guides

  • What a Jeweler’s Loupe Reveals on a Forged Signature

    What a Jeweler’s Loupe Reveals on a Forged Signature

    As an Amazon Associate we earn from qualifying purchases. This post contains affiliate links, and we may earn a commission at no extra cost to you.

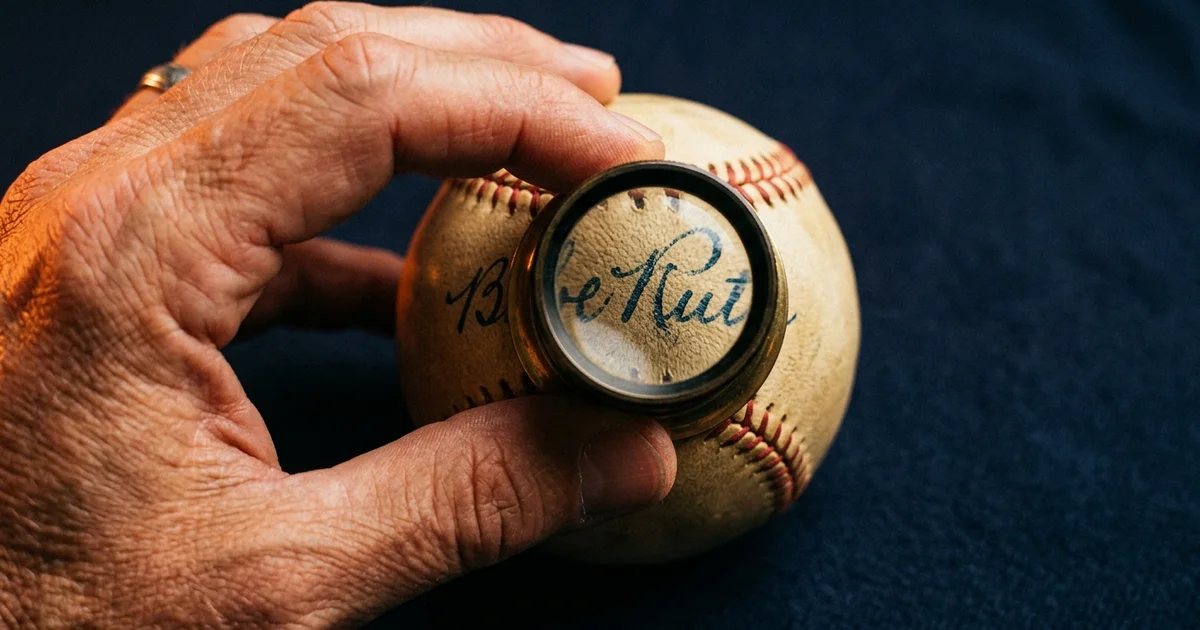
    Most collectors own a jeweler’s loupe for something else entirely: checking a diamond, reading a hallmark, squinting at a coin. Turn that same 10x lens on a signature and it does something the naked eye can’t. It shows you the ink itself, not just the shape of the name.

    That distinction matters more than any “does the signature look right” comparison you’ll find online. A skilled forger can copy a shape. Copying how ink actually sits on paper is a different problem.

    The magnification you actually need

    A standard 10x loupe is enough. You don’t need a lab microscope, and a lot of guides overstate this. 10x gets you close enough to see ink texture and stroke edges clearly, while still letting you move the lens across a full signature without losing your place.

    Go higher, 20x or 30x, and you’re often too zoomed in to read the stroke as a whole. You end up examining a single fiber of paper instead of the signature. Stick with 10x unless you’re chasing one specific detail a first pass already flagged.

    Good light matters as much as magnification. Raking light, angled low across the surface instead of straight down, throws shadows that make texture and raised ink stand out. A loupe under flat overhead light will miss things the same loupe under a raking desk lamp catches easily.

    What to look for in the ink

    This is where the loupe earns its keep. Under 10x, ink stops being a flat line and becomes a physical thing with texture.

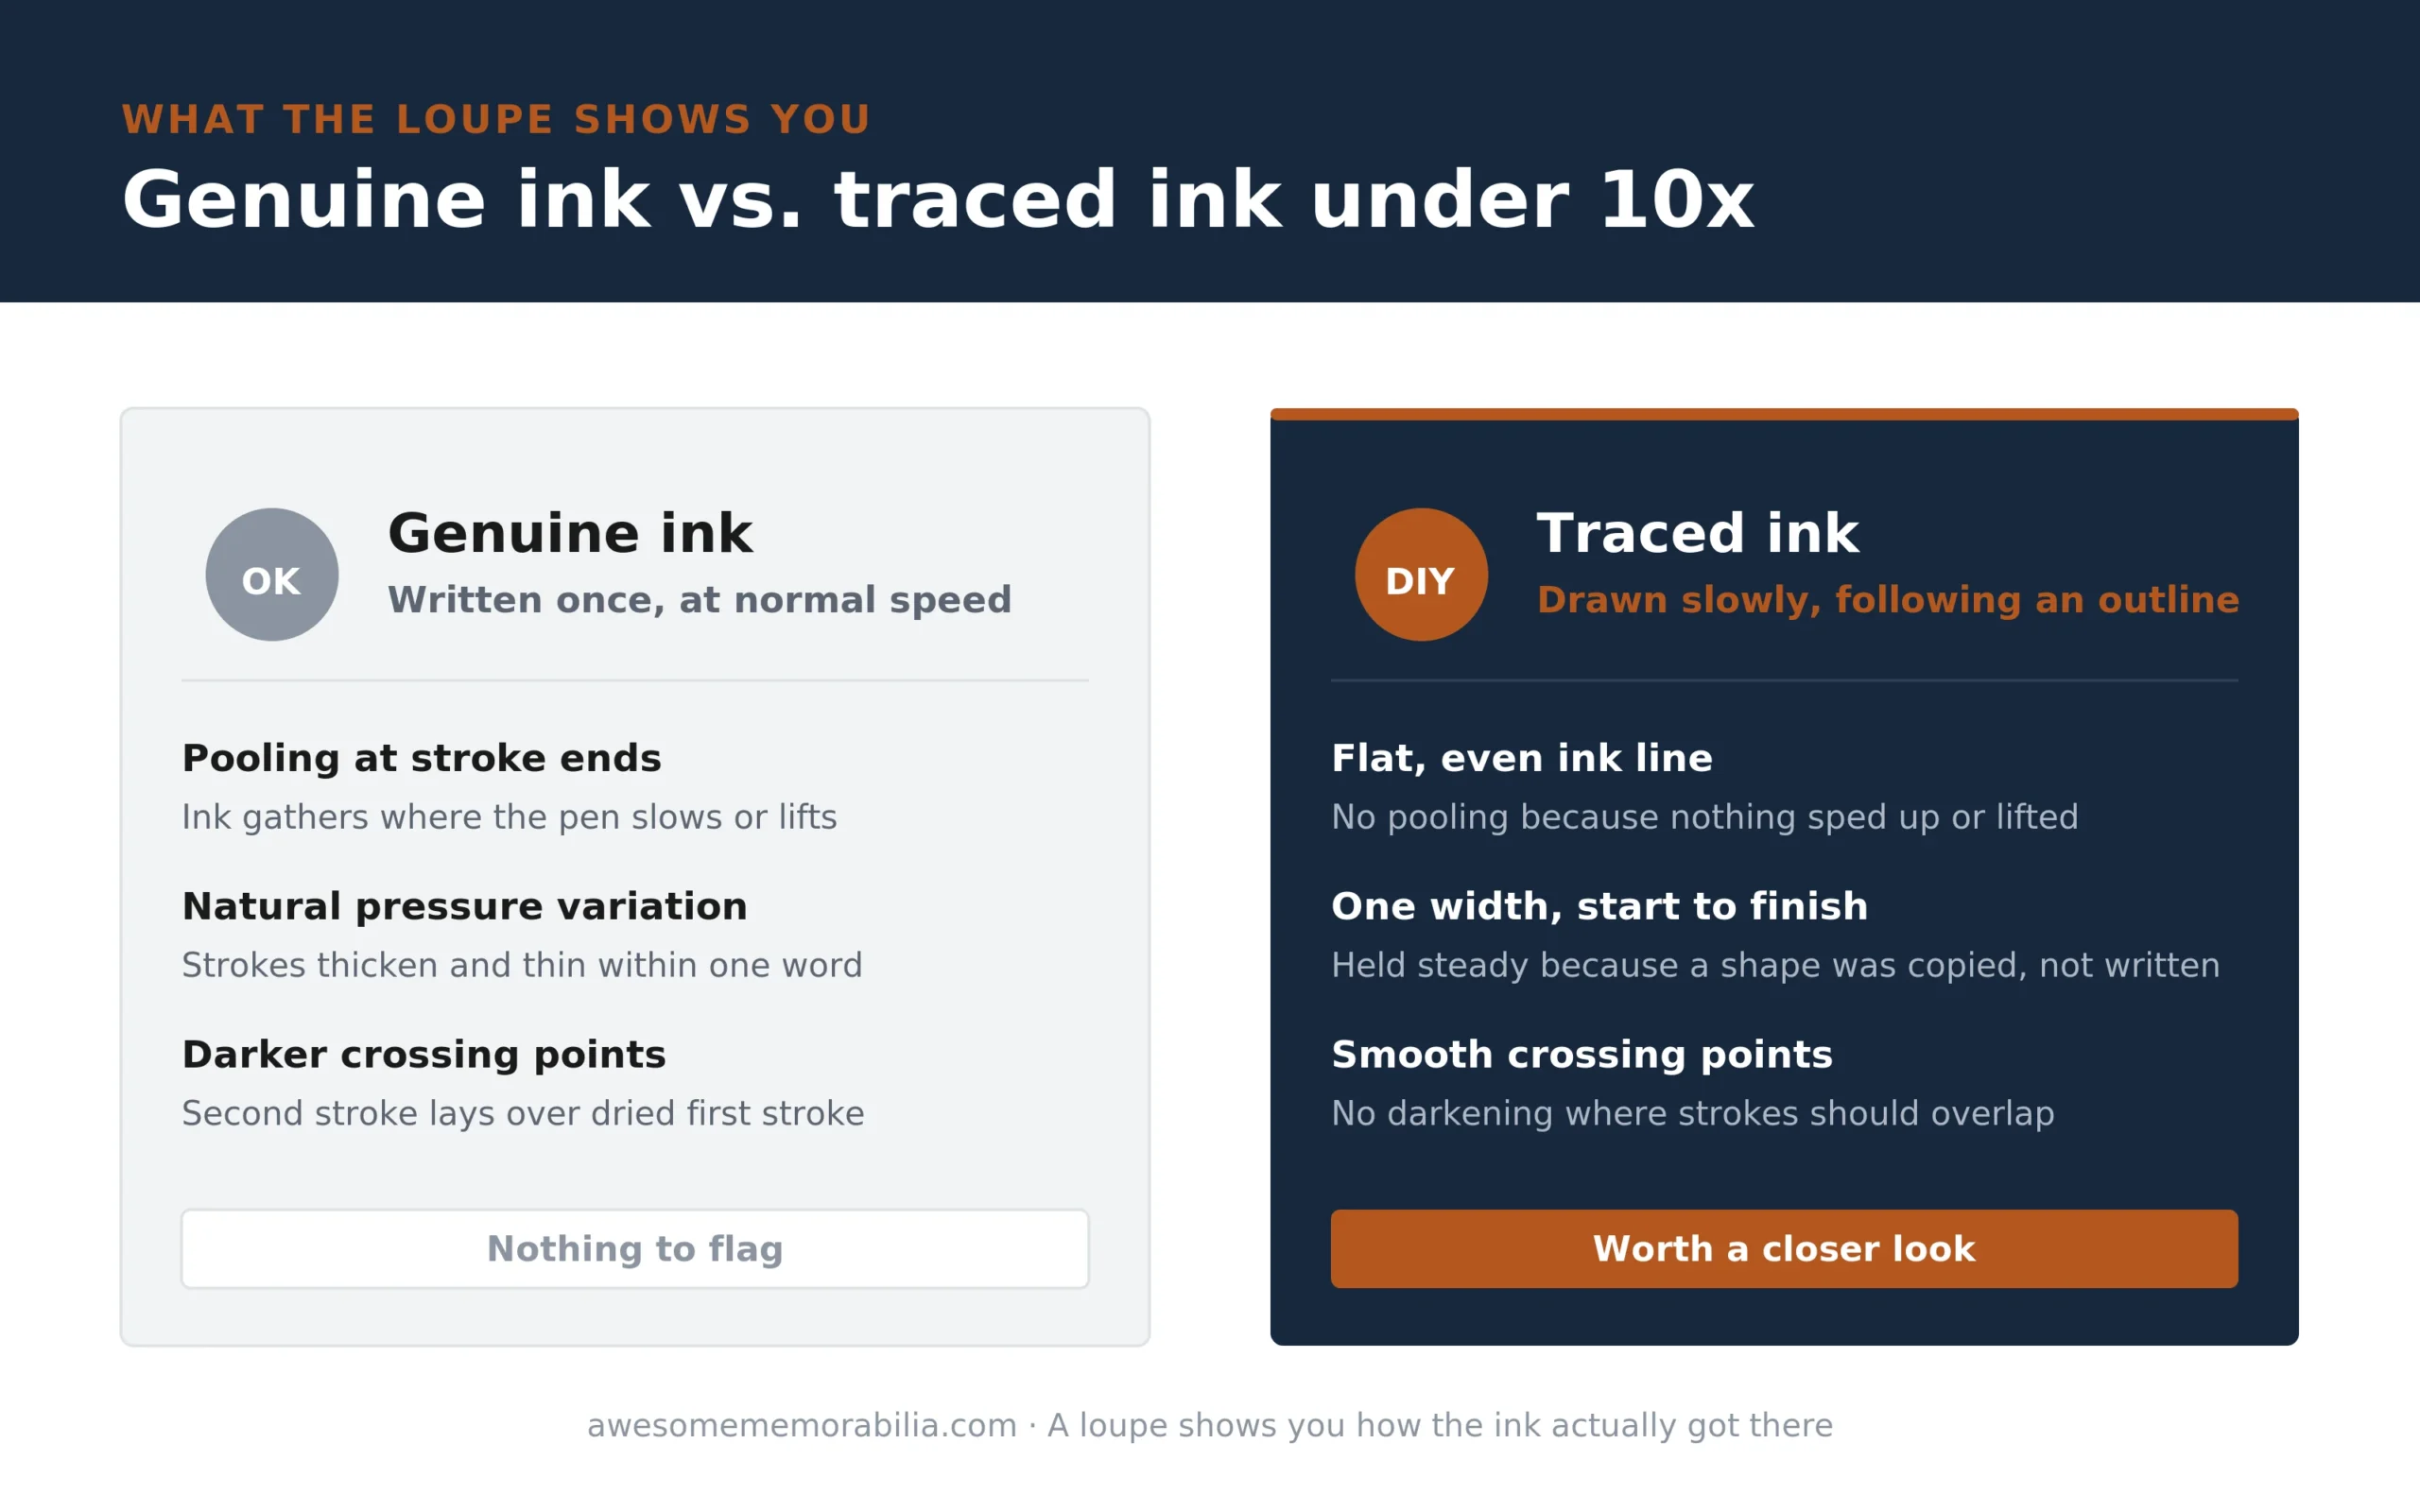
    • Pooling at stroke ends. A real signature, written at normal speed with a normal pen, leaves small pools of ink where the pen slows down or lifts, usually at the end of a letter or a flourish. Traced or slowly-drawn forgeries often lack this because the forger is drawing carefully rather than writing naturally, so the ink lays down evenly instead of pooling.
    • Consistent pressure variation. Genuine handwriting speeds up and slows down within a single word. That shows up under the loupe as strokes that thicken and thin naturally. A traced signature tends to hold one width for too long, because the forger is following an outline instead of writing.
    • A single, unbroken layer of ink. One pen, one pass, one layer. If part of a letter looks like it has a second coat of ink sitting slightly off from the first, something was added or retouched after the fact.
    Genuine ink under a jeweler's loupe pools at stroke ends and darkens at crossing points, while traced or forged ink stays flat and even with no darkening where strokes overlap

    Crossing points: the most reliable single tell

    If you learn to check one thing with a loupe, make it this. Most signatures have at least one spot where a stroke crosses over another stroke, the cross of a “t,” the loop of an “l” overlapping a neighboring letter, a flourish that doubles back on itself.

    At a crossing point, ink from the second stroke lays down on top of ink that’s already dry from the first. Under 10x, that shows up as a slightly darker, denser spot where the two layers overlap. It’s genuinely hard to fake, because a forger tracing a signature usually lifts the pen or slows down at exactly the point a real signer wouldn’t have thought twice about.

    No darkening at a crossing point, or a crossing point that looks suspiciously smooth and even, is worth a second look. It doesn’t prove anything by itself. It’s one data point, and a strong one.

    Loupe vs. magnifying glass

    A magnifying glass is fine for reading small print. It’s a weaker tool for this specific job. Most magnifying glasses run 2x to 4x, which is enough to see a shape more clearly but not enough to resolve ink texture or catch a crossing point cleanly.

    A loupe also forces you close to the surface, usually an inch or less, which cuts glare and stray light that a magnifying glass held at arm’s length lets in. That closeness is part of why jewelers use loupes instead of magnifying glasses for anything that requires real detail.

    If you don’t have one yet, get a true optical triplet rather than the cheap single-lens loupes sold as “10x” that blur badly toward the edges. The Nikon below is a straightforward pick.

    Good: genuine achromatic triplet glass, folds into a metal case that survives a bag or pocket, and the Nikon name means it’ll still be sharp in ten years.
    Not great: no built-in light, so you’ll still want that raking desk lamp for the ink work above. It also costs more than the LED-and-UV loupes that show up first in most searches, which are built for gemstones and add lighting you don’t need here.

    Recommended Loupe

    Nikon 10x jewelry triplet loupe

    Nikon 10x Jewelry Triplet Loupe

    • True 10x achromatic triplet lens, 13mm diameter
    • Folds into a protective metal case for a pocket or kit
    • No built-in light. Pair it with a raking desk lamp for the ink and stroke detail this guide covers
    Check current price on Amazon

    If you already own a loupe for grading or hallmark work, it’ll do this job too. No need to buy a second one.

    What a loupe can’t tell you

    A loupe shows you technique. It doesn’t identify a signer. Even a textbook-perfect crossing point and natural pooling only tell you the signature was likely written at normal speed by a real hand, not whose hand it was.

    Pair what you see under the loupe with a known exemplar of the signer’s autograph, and treat anything genuinely valuable the same way you’d treat a card under UV light: as a first filter, not a final verdict. When real money is on the line, get a reputable third-party opinion.

    Related guides


  • Reading a UV Light Result: Original Ink vs. Restoration

    Reading a UV Light Result: Original Ink vs. Restoration

    As an Amazon Associate we earn from qualifying purchases. This post contains affiliate links, and we may earn a commission at no extra cost to you.

    Fresh ink and old ink don’t glow the same way under a 365nm light. Once you’ve seen the difference side by side, you can’t unsee it.

    If you already own a 365nm UV flashlight, you have the tool. This is the part nobody explains well: what you’re actually looking at once the light comes on.

    Why ink glows under UV in the first place

    Most inks, ballpoint, Sharpie, gel, contain compounds that fluoresce under ultraviolet light because of how their pigments and binders absorb and re-emit light outside what your eyes normally catch. Old ink that’s had years to oxidize and settle into paper or a card’s surface fluoresces differently than ink laid down last week. Paper and card stock age the same way.

    That’s the whole trick a UV light exploits. Two materials that look identical in daylight age and react to UV differently once you stop trusting your eyes alone.

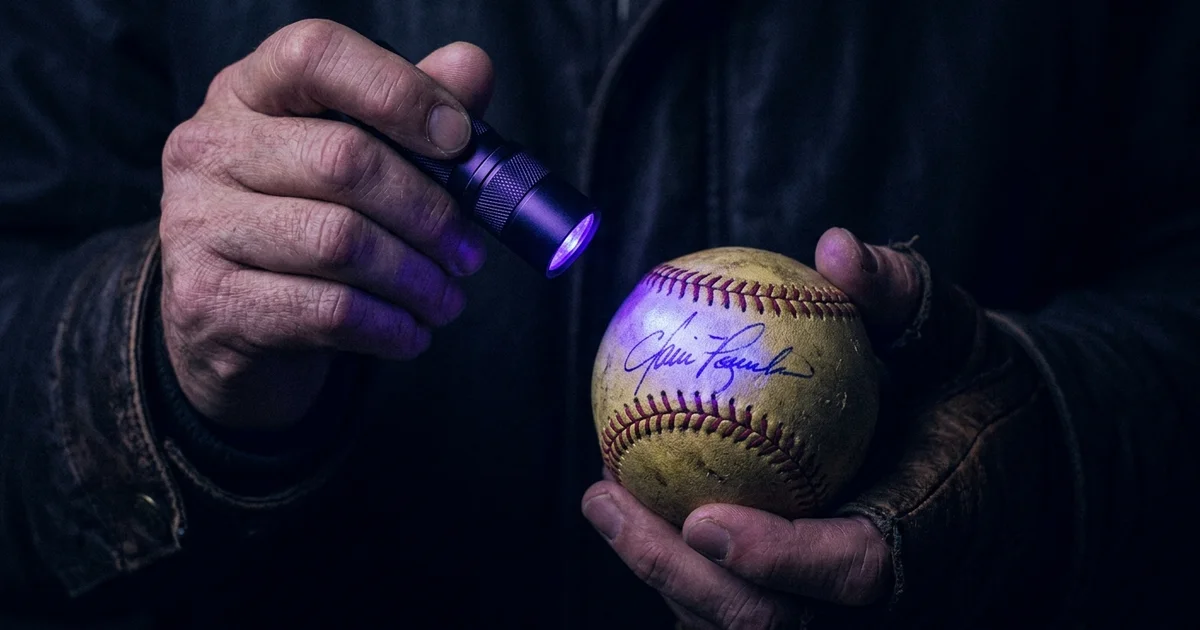
    Original autograph ink under UV glows dull and even; restoration or forged ink glows brighter, hotter, with sharp raised edges

    What original ink looks like

    Genuine, aged autograph ink reads dull and even. It sinks into the surface instead of sitting on top of it. Move the light across a real signature and the glow, if there’s any at all, stays consistent along every stroke, because the whole thing was written in one sitting with one pen at one point in time.

    What restoration or a forgery looks like

    Added ink stands out because it doesn’t share that history. A retraced signature, a “touched up” fade, or ink laid over a printed surface tends to fluoresce brighter, hotter, or a noticeably different color than the material around it. Look for:

    • A glow that jumps at the stroke edges. Original ink fades into the paper. Added ink often has a slightly raised, sharper edge because it’s sitting on the surface, not soaked into it.
    • Color mismatch inside a single signature. One letter glowing blue-white next to letters that stay dull isn’t a coincidence. Someone touched up part of a fading autograph and left the rest alone.
    • A signature that’s uniformly hot everywhere. A whole autograph lighting up bright and even, with none of the natural variation a real pen stroke leaves, points to the entire thing being added at once, not written years ago the ordinary way.

    Why autographs fade in the first place

    Light exposure is the biggest cause, especially UV from windows and old fluorescent bulbs. It breaks down ink pigment over years, which is exactly why a UV-blocking display case matters if you want a piece to last. A faded autograph isn’t automatically less authentic. It’s just old and poorly displayed.

    The problem starts when someone “fixes” that fade with new ink instead of living with it, or disclosing it.

    Can a faded autograph be restored honestly?

    Conservators can stabilize paper and ink without adding new pigment, and that kind of work doesn’t hide anything under UV because nothing new went on the surface. What actually tanks a piece’s value is undisclosed retracing: someone going over faded strokes with a fresh pen to make it look sharp, then selling it as if that never happened.

    The UV light doesn’t care about intent. It shows you where new material sits on old material. What you do with that information is the real authentication step.

    One read isn’t enough

    A single UV pass tells you where to look closer, not a final verdict. Cross-check anything questionable against a known exemplar of the signer’s autograph. If real money is on the line, get a reputable third-party opinion before you buy or sell.

    The light narrows the question. It doesn’t answer it by itself.

    Related guides